
Find the Kitchen Layout That Fits Your Life
Picking the right kitchen layout is the single most impactful decision you can make to improve daily flow, host with confidence, and boost your home's value.
Introduction
Picking the right kitchen layout is the single most impactful decision you can make to improve daily flow, host with confidence, and boost your home's value.
Key Features
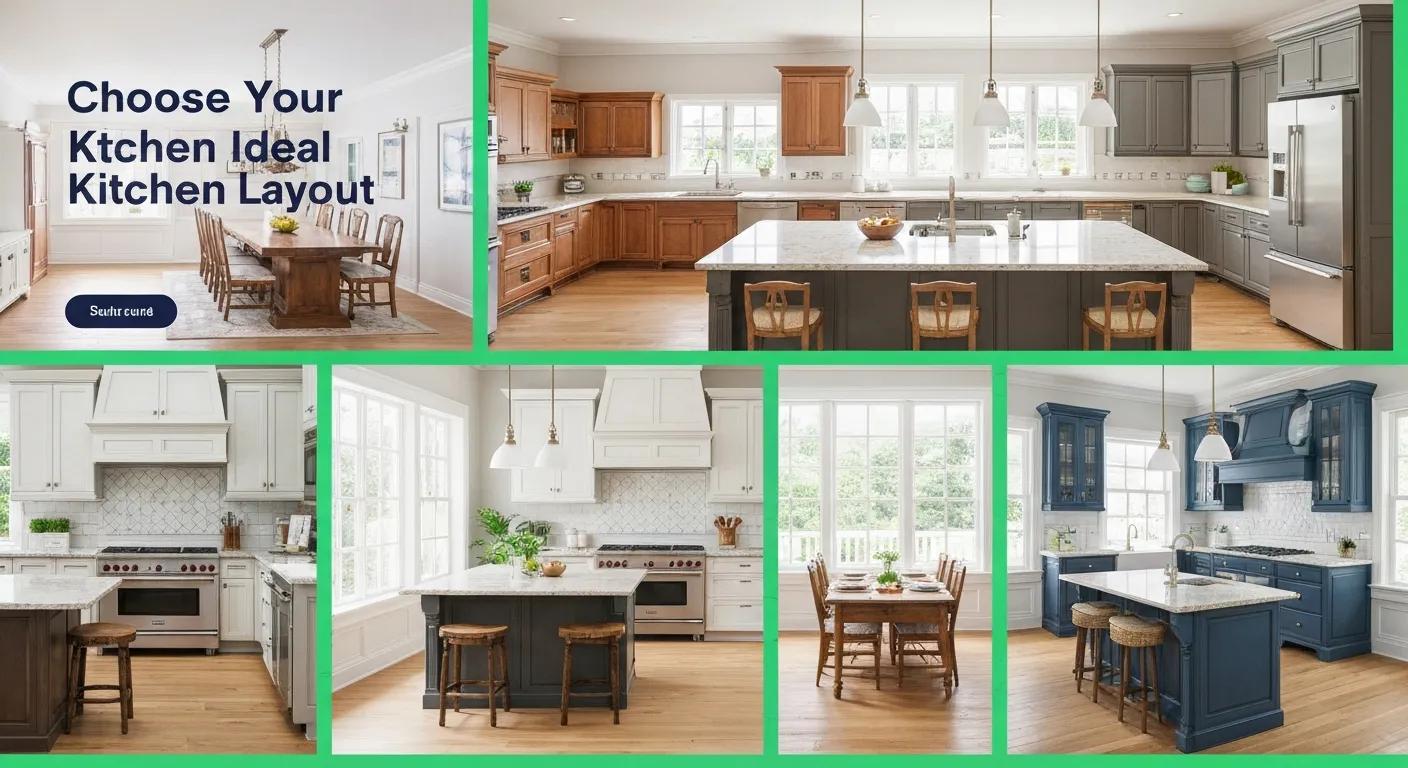
Picking the right kitchen layout is the single most impactful decision you can make to improve daily flow, host with confidence, and boost your home's value. A layout determines where walls, cabinets, appliances, and work surfaces sit — and it controls circulation, storage capacity, and how the kitchen supports cooking and social time. This guide walks through the core families—U-shaped, L-shaped, galley, one-wall, island, peninsula, and open-concept—and explains why the classic work triangle still matters even as modern kitchens add multi-zone workflows. You’ll get clear pros and cons for each layout, practical sizing and clearance rules, small-space solutions, and current trends like concealed storage and multi-purpose islands. We include comparison tables for quick decisions, actionable design tips, and a step-by-step framework to choose a layout that fits your lifestyle and budget. Finally, learn how professional design-build services turn a chosen layout into a buildable plan with real before-and-after projects from Sacramento, Santa Rosa, and San Diego.
Which kitchen layout types should you know about?
A kitchen layout is the spatial plan that organizes counters, cabinets, appliances, and traffic paths so cooking and cleaning happen efficiently and safely. Good layouts group related functions—prep, cook, clean—and place them close enough that tasks flow with fewer steps; that reduces walking, improves ergonomics, and protects countertop space. Knowing the common layout families helps you match room constraints and daily habits to a design that performs well for everyday life and resale. Below is a quick comparison to help you see which layouts fit your home and routines before you dive into the details.
Each layout type offers distinct functional trade-offs and a different look and feel:
Layout TypeBest For (space/lifestyle)ProsConsU-shaped kitchen layoutMedium to large kitchens with closed or semi-open plansLots of storage and continuous counter space; efficient work triangleCan feel enclosed; needs traffic-aware doorway placementL-shaped kitchen layoutOpen-plan homes and medium footprintsFlexible, uses corner space well, easy to add an islandCorner storage requires smart solutions; linear workspace can be limitedGalley kitchen layoutNarrow or long footprints, apartmentsVery efficient parallel workflow; excellent use of limited spaceCan be tight for multiple cooks; not ideal for entertaining
This snapshot highlights each layout’s strengths and prepares you to evaluate specific features, beginning with how U-shaped kitchens shape storage and movement.
What makes a U-shaped kitchen work — and what to watch for
U-shaped kitchens use three connected runs to form a horseshoe, delivering generous countertop and organized zones for prep, cooking, and cleanup. This layout maximizes storage with continuous cabinetry and gives ample workspace—great for families who use multiple appliances or cook multi-step meals. Practical details matter: allow 42–48 inches between opposing runs when space is tight, and place doorways so they don’t interrupt workflow. If you add an island, keep clearances so the work triangle remains effective and traffic doesn’t bottleneck. Planning corner-cabinet solutions prevents dead zones and makes the most of available storage.
U-shaped designs work best when circulation is channeled intentionally and clutter is hidden with pull-outs or appliance garages — which naturally leads into L-shaped options if you want more visual openness.
How L-shaped kitchens stretch function and flow
L-shaped kitchens arrange two perpendicular runs to create an efficient corner workspace that opens to adjacent living areas and easily accepts an island or dining extension. The L-shape works by adjacency: placing major appliances along the two runs forms a compact triangle while keeping the center clear for movement or seating. Corner-cabinet options — lazy susans, pull-out trays, diagonal drawers — convert wasted space into usable storage while keeping items within reach. For islands, plan 36–42 inches between the island and cabinets so people can move and appliance doors can swing freely.
Paying attention to corner solutions and island clearances is helpful when you turn to compact layouts that prioritize narrow footprints and vertical storage strategies.
Which layouts perform best in small or compact kitchens?
Small kitchens need layouts that favor linear efficiency, vertical storage, and visual openness so a tight footprint still feels usable and welcoming. The goal: minimize unnecessary travel and maximize usable surface and storage. That can mean a galley, a one-wall layout, or a compact L/U depending on width and how the kitchen adjoins living areas. Good lighting, reflective finishes, and integrated appliances enlarge perception, while pull-out pantries and tall cabinets add capacity without increasing square footage. Use the table below to match small-layout options to common dimensions and storage tactics.
Compare these small-space choices and apply the storage and design tactics that suit your room:
Layout TypeTypical DimensionsStorage StrategiesDesign TipsGalley kitchen layout7–12 ft length with 3–4 ft aisle clearancesTall pull-out pantry, under-counter drawers, vertical spice racksRun the same flooring and cabinet color to lengthen sightlinesOne-wall kitchen layout8–14 ft wall runs in studio or open-plan unitsIntegrated appliances, full-height upper cabinets, appliance garageAdd open shelving and a reflective backsplash to create depthCompact L-shaped or U-shapedSmall corner runs 8–10 ft eachCorner solutions, shallow uppers, toe-kick drawersChoose a slim island or peninsula for extra workspace without crowding
Use these practical dimensions and storage tactics as a starting point before looking deeper at why galley kitchens often outperform alternatives in narrow plans.
Why galley kitchens are a smart choice for narrow spaces
Galley kitchens use two parallel runs of counters and cabinetry facing each other, which concentrates tasks and minimizes lateral movement between prep, cook, and clean stations. That makes them very efficient in narrow homes or long apartment footprints where width is limited but length can be used. For comfort and safety, target at least 42 inches for a single-cook galley and 48 inches when two cooks share the space; those clearances keep the work triangle functional and allow appliance doors to open. Storage ideas include toe-kick drawers, tall pull-out pantries at the run ends, and wall-mounted magnetic strips to free counters for prep.
Good lighting and finish choices that reduce the tunnel effect will help — which leads into one-wall strategies that emphasize vertical storage and integrated appliances.
How one-wall kitchens stay stylish and efficient
One-wall kitchens put all functions—cooking, cleaning, refrigeration, and storage—on a single plane, creating the leanest footprint and a clean, modern aesthetic ideal for studios and lofts. The principle is vertical stacking: use upper and lower storage, and extend cabinets to the ceiling to reclaim lost capacity. Integrated or column appliances preserve uninterrupted sightlines, while appliance garages and pull-out counters hide clutter when you don’t need it. A strong backsplash, mixed materials, and layered lighting keep a one-wall kitchen feeling intentional and finished rather than thrown together.
When space allows, islands and peninsulas add prep surfaces and casual seating without sacrificing efficiency — the next section covers those choices.
What do islands and peninsulas add to a kitchen?
Islands and peninsulas serve multiple roles: extra prep area, informal seating, added storage, and flexible appliance placement. An island creates an independent work surface that can house a sink or cooktop, forming secondary work triangles and enabling multi-cook scenarios. A peninsula extends a run into the room to deliver many island benefits when a freestanding island isn’t possible. Keep at least 36–48 inches of clearance around islands for comfortable traffic and appliance movement, and plan seating with 12–15 inches of overhang per stool. Functionally, islands support multi-zone workflows by separating prep and cleanup and act as visual anchors that tie an open-plan space together.
Below are the sizing guidelines and decision points to help you decide if an island or peninsula is right for your remodel.
Islands and peninsulas deliver several tangible benefits:
- More prep space: Extra surface area for multi-step cooking and staging.
- Additional storage: Room for deep drawers, beverage centers, or hidden trash systems.
- Casual seating: A place for quick meals and socializing that supports entertaining.
These advantages make island dimensions and circulation critical considerations — see the measurement and seating guidance below.
Why islands are a popular addition in modern remodels
An island centralizes prep, cooking, cleanup, and seating into one flexible element, increasing capacity and making the kitchen a social hub. Islands let you add secondary sinks or cooktops to create parallel workflows, reducing congestion at the main range and enabling multiple cooks to work at once. For seating, allow 12–15 inches of overhang per seat and a minimum depth of 36 inches if appliances are installed; deeper islands can hold cabinetry and appliances while keeping knee space. Today’s trends favor multi-zone islands with integrated charging, task lighting, and hidden storage so surfaces stay tidy during gatherings.
If a full island won’t fit, a peninsula can offer many of the same benefits in smaller footprints.
How a peninsula can improve flow and seating without using as much floor area
A peninsula extends an existing run to provide island-like benefits while saving floor space. It’s especially useful in L-shaped or one-wall plans that need extra workspace without compromising circulation. A peninsula creates a clear boundary between zones, supports seating, and can host a prep sink or cooktop to form a practical secondary work area. Maintain 36–42 inches between the peninsula and opposing surfaces, and position seating to avoid blocking traffic. In open-plan homes, a peninsula becomes a transition piece that anchors the kitchen and offers a staging surface when you entertain.
Deciding between an island and a peninsula depends on clearance, traffic flow, and how you like to entertain — all of which connect to open-concept planning below.
What is an open-concept kitchen and why do homeowners love it?
Open-concept kitchens remove full-height barriers between kitchen and living areas to create shared spaces that support socializing, sightlines, and flexible entertaining. The idea is spatial continuity: consistent flooring and sightlines let hosts cook while staying connected to guests, with islands often acting as the kitchen’s anchor. People choose open plans for inclusive gatherings, increased daylight, and the sense of more square footage. The trade-offs are noise, odors, and the need for concealed storage. Address those with strategic venting, acoustic materials, and high-capacity, hidden storage in islands or nearby walls.
Design tips for open-concept kitchens emphasize cohesive materials and clear zoning so the space reads as one integrated area that still supports distinct activities.
How open-plan design improves flow and entertaining
Open-plan layouts improve flow by removing barriers, increasing visual continuity, and creating flexible circulation that supports multiple uses—cooking, dining, and relaxing—without rigid room boundaries. Islands act as social centers where food prep, buffet service, and seating keep hosts engaged with guests while through-traffic moves around the island to reduce interruptions. To support entertaining, include multi-zone lighting, convenient power and charging, and durable finishes that withstand heavy use. Matching materials—complementary countertops, coordinated hardware, and consistent wood tones—helps the kitchen read as part of a unified living area while staying functional.
Those zoning and material principles lead into a practical checklist of finishes and layout choices for open-plan integrations.
Design tips to integrate an open-concept kitchen successfully
Make the connection between kitchen and living areas feel intentional by using a consistent palette and materials. Define zones with furniture placement, rugs, or ceiling treatments while using the island or peninsula to anchor the kitchen visually. For acoustic control, add soft furnishings, acoustic panels, or high-extraction range hoods to manage sound and cooking smells. Favor concealed storage and tall cabinetry to keep clutter out of sight, and plan layered lighting—task lighting over work surfaces, ambient light for living areas, and accent lights to highlight architecture.
These integration tips lead naturally to the lasting principle that shapes efficient layouts: the kitchen work triangle.
How the kitchen work triangle helps layout efficiency
The kitchen work triangle links the refrigerator, sink, and range into an efficient arrangement that minimizes unnecessary movement and improves ergonomic flow. The idea is adjacency optimization: placing these nodes at comfortable distances reduces wasted steps, clarifies appliance placement, and supports single-cook efficiency. Modern kitchens adapt the triangle with secondary zones and additional prep stations for multi-cook households. The triangle remains a useful guideline even when islands, extra refrigeration, or wall ovens require flexible interpretations. Below are the classic rules that still guide many layout choices and offer fast validation during planning.
The traditional work triangle rules are still useful practical benchmarks.
What are the basic rules for the work triangle?
Classic work triangle guidance places the refrigerator, sink, and range as three points with unobstructed lines between them. Each leg should ideally be 4–9 feet, and the triangle’s total perimeter should fall between 13 and 26 feet. Those distances keep tasks within ergonomic reach and reduce back-and-forth steps. Each leg should be free of major traffic to avoid collisions; common mistakes include putting the sink in a busy path or stretching one leg too far. Solve those issues by adding a secondary prep sink or redistributing appliances into zones. Use the triangle as a quick diagnostic: measure the proposed layout and confirm islands or seating won’t break the triangle’s functional flow.
With that foundation, you can adapt the triangle for multi-cook scenarios and zone-based kitchens.
How the triangle changes for modern, multi-cook kitchens
Today’s kitchens often expand the single triangle into multiple zones: a primary cooking triangle for the main chef, a baking or beverage zone with a secondary sink, and an island prep zone for collaborative work. Treat the triangle as a set of functional relationships—appliance → relationship → zone—so roles are clear: fridge supplies ingredients to prep, prep feeds the range, and cleanup happens at the sink. For households with several cooks, provide at least two parallel prep surfaces and consider a second dishwasher or prep sink to prevent bottlenecks. Islands with integrated tasks create secondary triangles that coexist with the primary one and allow simultaneous workflows.
These multi-zone approaches feed directly into the decision framework below for choosing your layout.
How to choose the right layout for your remodel
Choosing the right layout starts with a structured process that balances space, lifestyle, budget, and resale value. Begin by assessing how you cook, how often you entertain, your storage needs, and the look you want. The selection mechanism is trade-off analysis: list priorities, measure the space, and try layout families on workflow and circulation before you commit. The table below pairs homeowner considerations with practical actions, plus how a design-build partner turns choices into plans while maintaining schedule and budget.
Use this decision matrix to align priorities with tangible next steps and buildable solutions.
FactorWhat to ConsiderVivify's Approach (example actions)Space & FootprintAvailable wall runs, ceiling height, and circulation clearancesMeasure and render multiple layout options to maximize storage and confirm required clearancesCooking StyleSingle cook vs multi-cook, appliance needs, prep habitsRecommend zoning and secondary prep sinks for multi-cook householdsBudget & TimelineRemodeling budget, phasing preferencesCreate phased plans that prioritize utilities and set clear milestones to stay on budget
This matrix links decision factors to concrete design actions and leads into a homeowner checklist that helps finalize layout choices.
When weighing options, use this checklist to prioritize needs:
- Assess daily cooking and entertaining habits: How often you cook and host will determine whether prep or seating is the priority.
- Measure and map your existing footprint: Note door swings, windows, and plumbing or chimney constraints to identify feasible layouts.
- Rank storage and appliance needs: Prioritize built-in refrigeration, oven placement, and pantry size to avoid costly relocations later.
This checklist narrows choices toward layouts that match actual use and leads naturally into how a professional partner executes the final plan.
What should homeowners weigh when selecting a layout?
Homeowners should consider kitchen size, how often they cook, how many people cook at once, storage expectations, and resale impact. Functionally, protect clearances and appliance adjacencies so work zones stay ergonomic and through-traffic doesn’t cross primary activity areas. Budget and schedule determine whether structural changes—like opening a wall for an island—are realistic, while resale-minded choices favor broadly appealing layouts such as open-concept flow and generous storage. Balance trade-offs: dense storage versus a large island, hidden appliances versus display-worthy finishes, and pick materials that suit both daily life and market tastes.
Balancing these factors prepares you to work with a designer who turns preferences into accurate plans and dependable schedules.
How Vivify Custom Remodeling helps you design the right layout
Vivify Custom Remodeling combines experienced kitchen design with hands-on construction to guide homeowners from layout selection through project completion. We translate your priorities into rendered layout options, detailed floor plans, and phased schedules so decisions feel informed and predictable. Our portfolio of before-and-after projects shows how layouts perform across Sacramento, Santa Rosa, and San Diego, helping you picture results in local homes. When you’re ready, Vivify offers consultations and portfolio reviews to align layout choices with practical remodeling constraints and design goals.
This overview points toward next steps while keeping the focus on practical choices and real outcomes.
The recommendations here reflect current trends—concealed storage, multi-functional islands, and jewel-tone cabinetry—while keeping efficiency and buildability at the core of every remodel.
Smart Compact Kitchen Layout for Optimized Space and Functionality The design highlights the work triangle, cabinet storage, and counter space to meet everyday needs within a minimal footprint. It balances basic functionality with efficient use of space, making it a practical solution for small households or nuclear families that cook one to two meals at a time. A smart compact kitchen layout to optimize space utilization, A Verma, 2021
Frequently Asked Questions
What should I consider when choosing a kitchen layout?
Think about kitchen size, cooking frequency, and how often you entertain. Measure available wall runs and circulation clearances to ensure practical movement. Consider storage needs and appliance count, and keep resale in mind—layouts like open-concept kitchens and ample storage tend to appeal to many buyers. Balancing these elements will help you pick a layout that works for daily life and future value.
How can I maximize storage in a small kitchen?
Use vertical space with full-height cabinets, add pull-out shelves or lazy Susans in corners, and include under-counter drawers. Toe-kick storage and tall pull-out pantries add capacity without expanding the footprint. Open shelving can make the room feel larger while keeping frequently used items accessible. Consider multi-purpose pieces such as an island with built-in storage to increase utility.
What are the benefits of an open-concept kitchen?
Open-concept kitchens improve social interaction and daylighting by removing barriers between cooking and living areas. They create flexible spaces for dining and entertaining and make a home feel larger. The trade-offs include managing noise, odors, and visible clutter; solve those with good ventilation, acoustic materials, and concealed storage.
How do kitchen islands improve functionality?
Islands provide extra prep surface, storage, and casual seating. They can house sinks or cooktops to create secondary work zones that reduce congestion at the main range, and they let multiple people work comfortably at once. Proper island sizing and clearance are essential to keep traffic flowing and maintain access to appliances.
What common mistakes should I avoid in kitchen layout design?
Avoid inadequate clearances between appliances and work areas, which hamper movement and efficiency. Don’t ignore the work triangle—poor appliance placement creates wasted steps. Plan for enough storage to prevent clutter and don’t overlook lighting and ventilation, both critical for comfort. Also consider future needs so the layout stays functional as your household changes.
How do I incorporate modern trends into my kitchen layout?
Add multi-functional islands, concealed storage, or bold cabinetry colors for visual interest. Open shelving can feel contemporary while providing quick access to everyday items. Integrate smart technology like touchless faucets or smart appliances to increase convenience. Balance trends with timeless choices so the kitchen remains practical and appealing long-term.
Start you project
Explore Vivify Design Collections
Discover thoughtfully curated kitchen, bathroom, and interior remodeling styles tailored to modern California living. Browse premium finishes, cabinetry options, color palettes, and custom design inspirations created to bring your vision to life.

Start Planning Your Kitchen or Bathroom Remodel
Ready to start your kitchen or bathroom remodel? Schedule a free consultation with Vivify to discuss your goals, compare design options, and receive clear next steps for your project.

.png)

.png)